- Published on
How To Make A Jade Bonsai Tree

Jade is a fantastic plant to use for bonsai, especially for beginners. It is widely available from nurseries and garden stores and can be easily propagated from cuttings. In this blog, we'll show you how to make a Jade bonsai tree step by step.
Here's what we'll look at in this guide on how to create a Jade bonsai tree:
- Preparation
- Pruning and wiring
- Exposing the rootball
- Preparing the pot
- Potting the tree
- Finishing touches
- Aftercare
Step 1 - Preparation
To follow this guide you'll need a few things. Obviously, you'll need a Jade plant, but you'll also need some equipment and tools to get the job done.

Here's what you'll need to start a Jade bonsai:
- Jade plant - this can be bought from a garden center or grown from a cutting
- Pot - bonsai pots are widely available to buy from online or local bonsai stores.
- Soil - if you already have akadama then this is ideal, but otherwise the best soil for Jade bonsai is something well-draining (you can purchase from a bonsai store online pre-mixed)
- Scissors (or pruning shears if you have them) - any sharp cutting tool will be fine
- Chopstick - one from last friday's dinner will do nicely
- Aluminium bonsai wire - this can be purchased cheaply from a bonsai store (or avaiable on Amazon)
- Potting mesh/screen - again, from a bonsai store
Make sure your Jade is healthy and well-watered in the weeks leading up to doing work on it.
Make sure you have a good space to work with. Your kitchen table is fine, just make sure you put down some towels or something to catch the soil.
Step 2 - Pruning And Wiring
To style your Jade plant as a bonsai you will need to give it shape. This can be done with pruning and wiring.
Wiring will give you much more control over the shape but carries the risk of scarring the branches if applied poorly or left on for too long.
Pruning has no risk of wire scarring but takes much longer to achieve the desired result and gives you limited control.
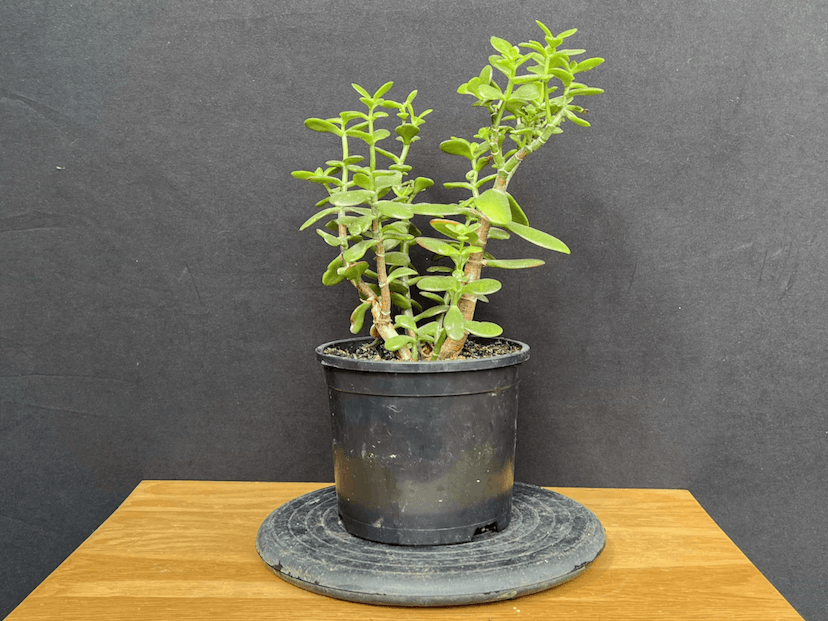
The Jade plant I'm working with here already has some interest, because it is growing as a clump with multiple trunks. I decided that wire in this case wouldn't add all that much, so I opted just to prune the tree so that the trunks were different heights.
Don't feel you need to achieve perfection at this step, you can (and will) come back at a later date to improve the design over time.
Step 3 - Exposing The Rootball
Now we need to prepare the tree for its new pot.
Start by removing the tree from its current pot. If it doesn't slide right out, clear some soil from the edges of the pot with your chopstick.
Next, start scraping away soil from the top of the rootball with your chopstick to expose any nebari (flaring root base) that might be present.
You then want to reduce the height of the rootball from the bottom up until it will fit inside your pot.
Finally, reduce the sides of the rootball so it fits in its new pot. (Again, this is done by scraping soil away with the chopstick).
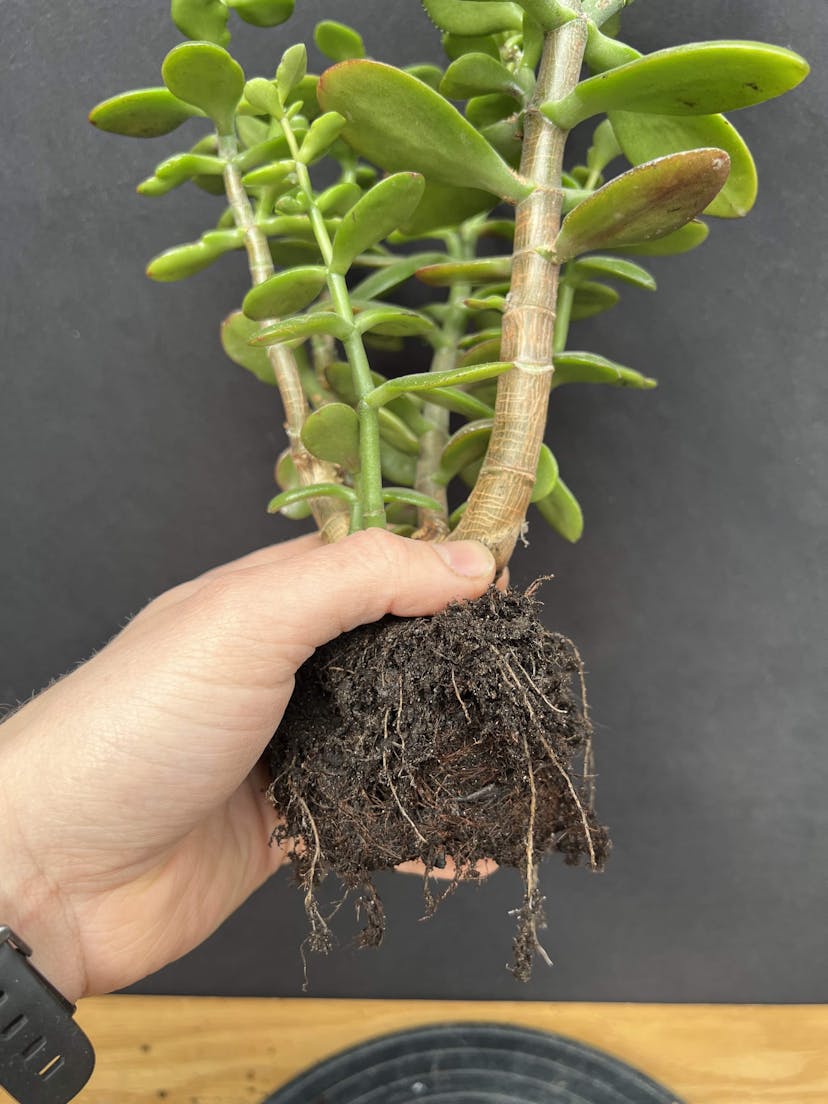
Jade do not grow huge numbers of roots in a short space of time so you may likely encounter the same situation I did. Once I removed the tree from its pot, 90% of the soil just fell away.
The tree must have been up-potted at some point but hadn't rooted well into the new soil. The tree, therefore, fit very well into its new pot and had the bonus of not having any actual roots removed.
Step 4 - Preparing The Pot
Place the tree down gently, making sure not to disrupt any styled branches. We now need to prepare the pot.
Firstly, use your wire to tie the potting mesh over the drainage holes to prevent soil from falling out.
Next, you need to work out your tie-down strategy.
The tree must be held securely in the pot. This is so it a) doesn't fall out and b) allows new roots to grow. Roots can only grow when immobile, so the more 'wobble' the tree has in the pot, the fewer roots will grow.
Securing a young Jade plant into a bonsai pot can sometimes be a bit fiddly, as they usually have a small and fragile rootball (as pictured above) and no large structural roots to secure to.
Think carefully about how you will secure the tree into the pot. This usually is done by crossing wire over the rootball on two or three sides.

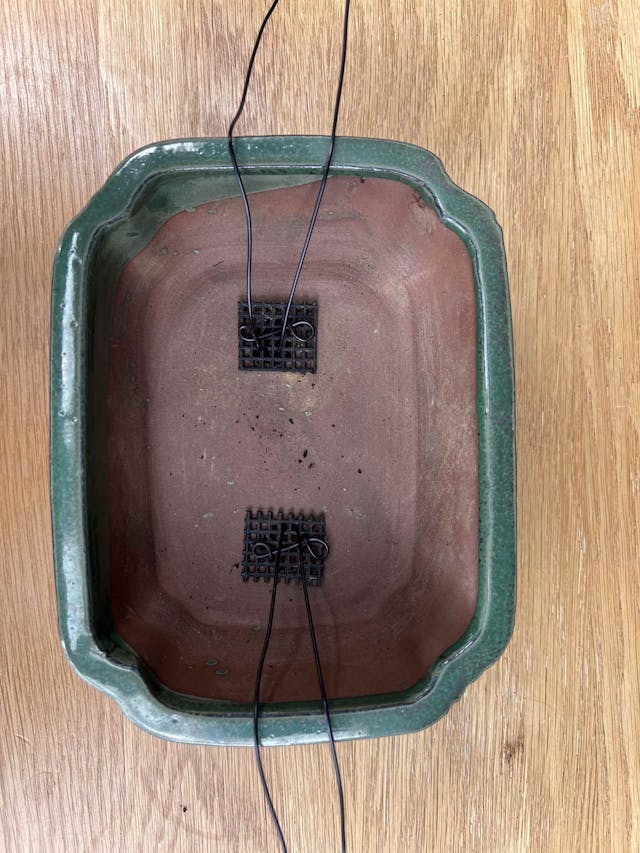
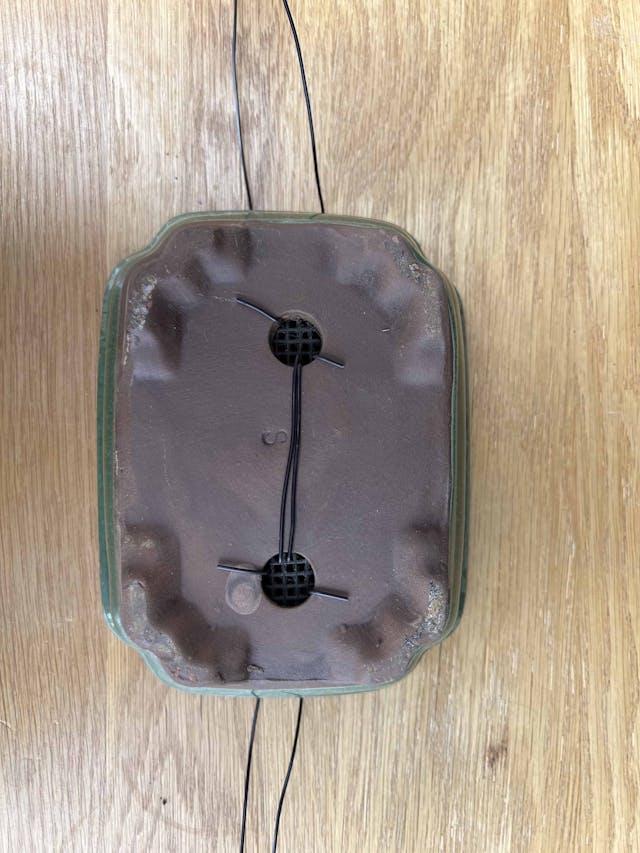
When you have worked out your strategy, insert wires into your pot in the positions you will need them. If in doubt, add an extra tie-down point to give yourself options once the tree is in the pot.
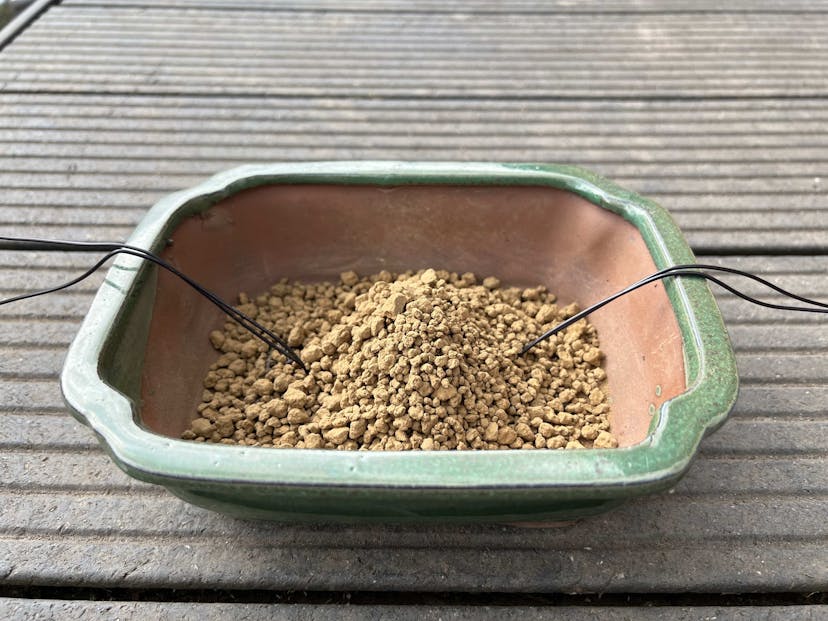
Finally, cover your pot with a thin layer of soil on the bottom and add a small mound of soil in the centre of the pot.

Step 5 - Potting The Tree
Settle your Jade into the pot by gently placing it onto the soil mount and softly and slowly wiggle it from side to die to settle it into the soil.
Make sure your tree is positioned exactly where you want it and at the angle you want. Lightly apply your tie-down wires, but don't fully tighten them yet.
Fill the pot with soil.
Now double-check the tree is still in the correct position and fully tight your tie-down wires.
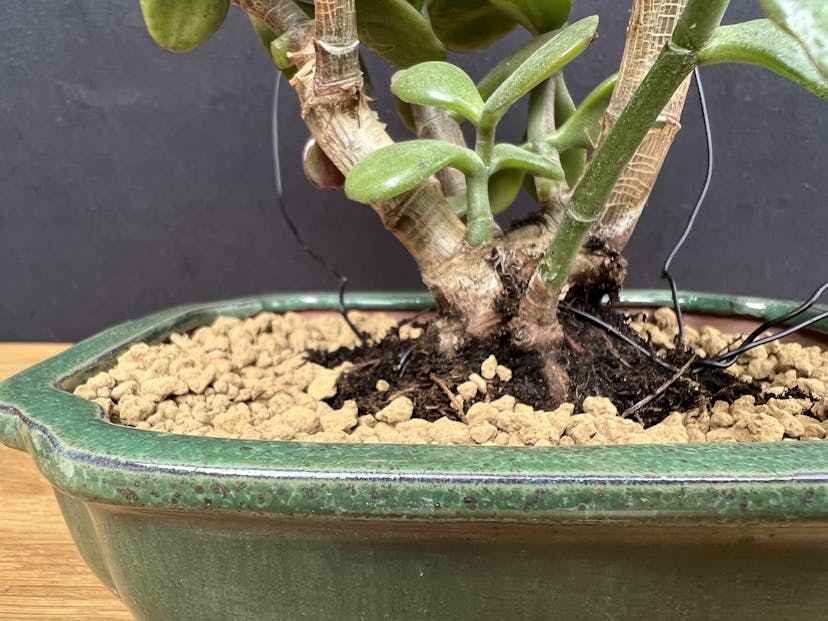
Tie-down wires are semi-tightened and soil has been filled around the tree. Spare wires at the back were not needed and were cut away.
Your tree should be very secure in the pot now. Finish off by using your chopstick to introduce soil into any air pockets with a gentle stabbing motion.
Step 6 - Finishing Touches
Though not essential, I like to apply a moss top dressing to my bonsai trees. It has many benefits:
- Evens out the distribution of water in the pot
- Encourages the growth of healthy bacteria and fungi
- Protects soil from breaking down as quickly
- Looks nice once established
The top dressing I use is a 1:1 mix of ground-up sphagnum moss mixed with ground-up green moss collected from the garden. Moss can be fussy about the environment it grows in, so if you collect and cultivate it locally you can be assured it will grow well on your bonsai.
Sprinkle a light layer of topdressing over the soil, then mist it with a spray bottle to prevent it from blowing away.
Next, we need to water the tree. This should be a very thorough watering to wash out any fine dust particles from the pot.

You should use a watering can or a hose with a fine shower head.
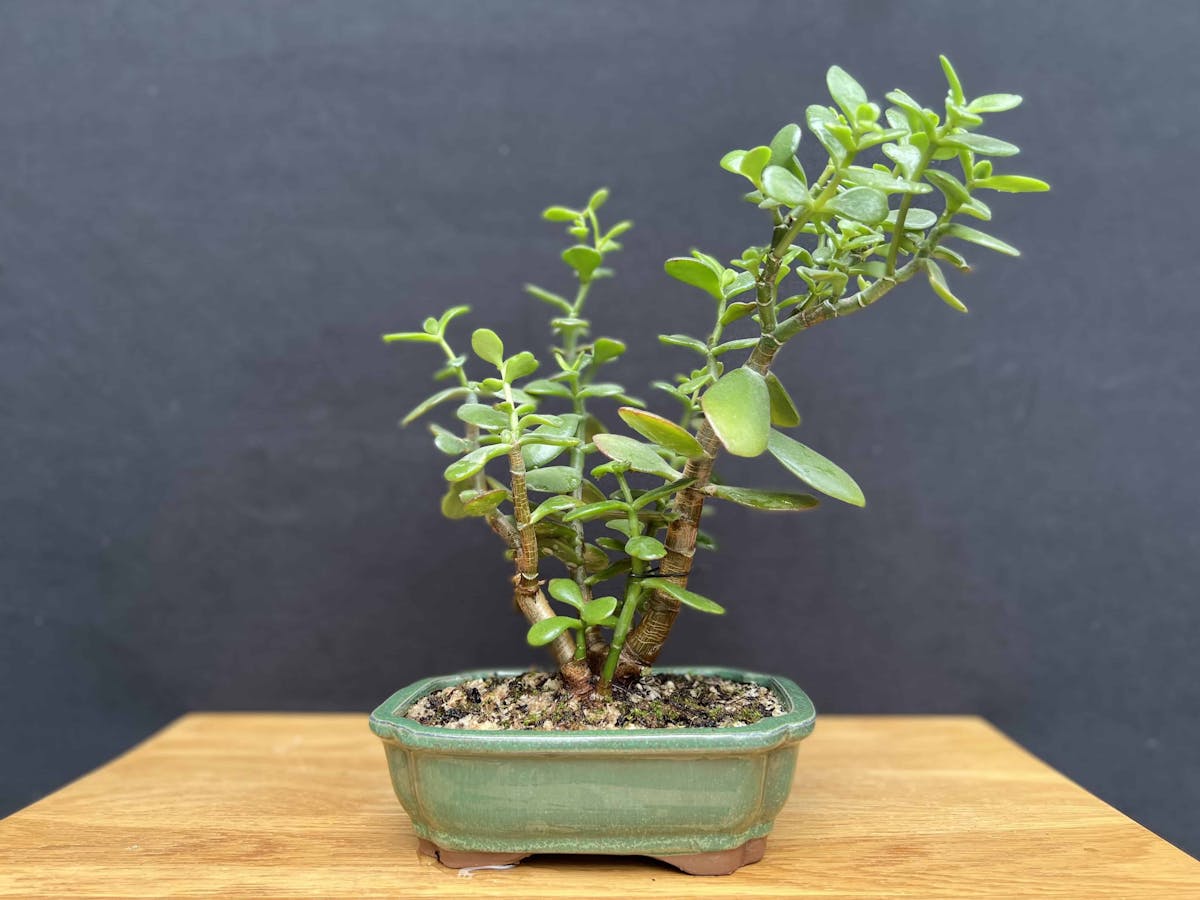
Once the tree has been watered, you can place it in its new home to enjoy.
Aftercare
Now you have a Jade bonsai, you will need to give it sufficient care to allow it to thrive.
Jade are succulent plants that store a lot of water in their leaves and vascular system. They generally do not need as much watering as other bonsai trees, so your biggest danger will be over-watering your tree.
The tree pictured in this blog did not need water for 2 weeks after its initial creation.

You should allow the soil to dry out between watering. Wait for the soil to change to a lighter colour and stick your finger in the pot to check the moisture level.
Jade can be grown both indoors and outdoors (in a warm climate) and the care requirements are generally the same.
I am growing mine indoors, so the only difference in care that I am applying when compared to my outdoor trees is with regards to the moss top dressing. As an indoor tree, the top dressing will dry out much quicker than the rest of the soil mass as the relative humidity in my house is low. To help the moss grow I am misting the soil every few hours with a spray bottle to keep it damp. When checking the moisture level of the soil system, I move a small area of top dressing aside so I can view the soil.
This is different from how I water my outdoor trees, where I rely on the top dressing as an indicator of whether I need to water or not.
As well as watering, you will need to prune your Jade bonsai every few months to encourage/maintain the desired shape and style.