- Published on
Birch Bonsai Tree Care - 2023 Update

Birch (Betula) is a wonderful species to use for bonsai. With small leaves and great mature bark, birch bonsai can be one of the best trees to represent nature in miniature.
In this guide, I'll take you through everything you need to know to make your Betula bonsai absolutely amazing. (And if it's already amazing, I'll tell you how to keep it that way!)
This is a very thorough and detailed post, so feel free to skip to the section you need just now and come back to read up on other areas when required.
- Fundamentals
- Design
- Pruning to maximise ramification
- Repotting
- Fertilization
- Pests and disease
- Birch bonsai FAQs
Fundamentals
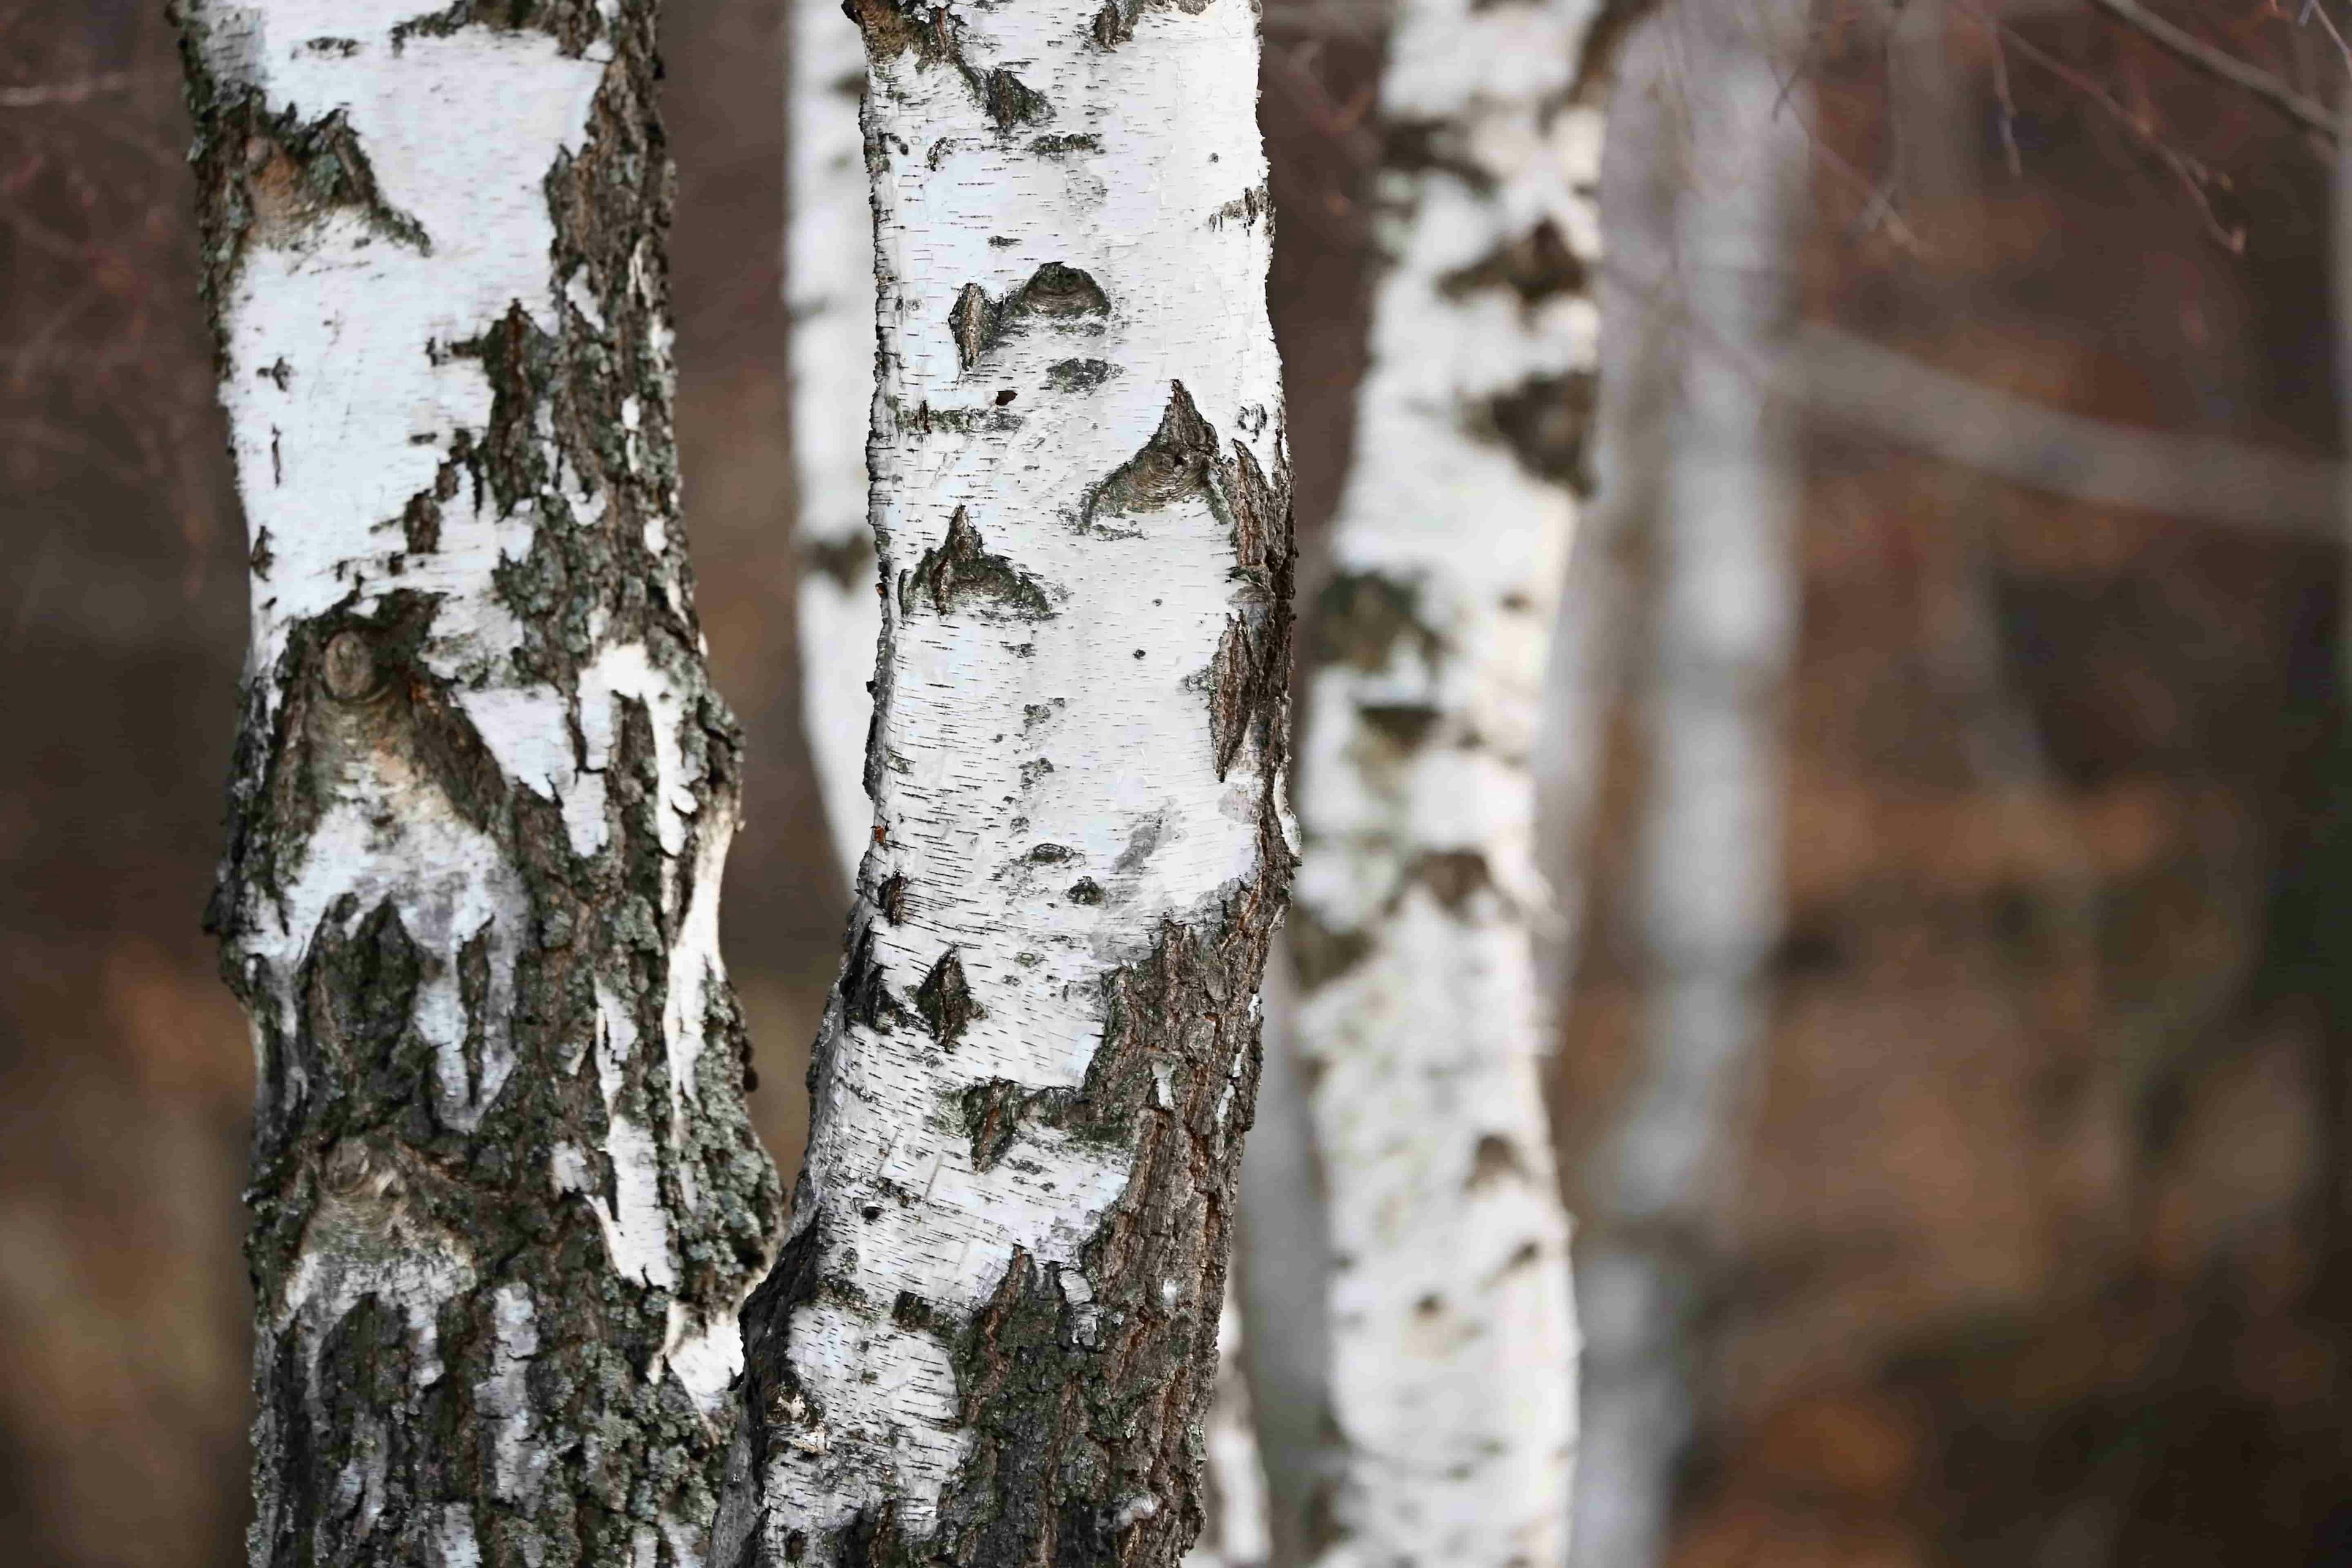
Birch trees have slender lines, attractive bark, and delicate leaves that lend themselves to stunning bonsai compositions.
Like other deciduous trees, birch are leafy and green through the growing portion of the year. Their leaves turn yellow over autumn to give you a beautiful fall canopy before they finally drop their leaves over winter and can have a compelling winter silhouette.
Birch have alternating leaves, that are usually ovate and toothed.
Birch are hardy and frost tolerant trees that do well in bonsai containers. They have a reputation for random branch dieback, which can present a challenge if we don't prune them correctly (more on that later).
Silver birch (Betula pendula) is the most popular species of birch for bonsai, but many other varieties are often used.


Design
Birch lends itself to many styles when training as bonsai. This is thanks to its vigorous growth habit and some characteristics unique to the species.
Informal upright
As with most broadleaf deciduous trees, birch can be grown as great informal upright trees. They are often found this way in nature, as a single tree with some gentle movement in the trunk.
When growing an informal upright birch the angle of the branches is significant. You can take two approaches - the more traditional Japanese model where branches are angled downwards, similar to a pine bonsai, or the more natural-looking method of angling branches upwards.
There is no right or wrong answer to this. It will depend entirely on your taste and on the material you are working with. Some trees have a wild feel to them which suits a natural look, while others are suited to the more toned-down Japanese aesthetic.
The important thing is that you choose one and commit to it. If your tree has some branches moving upwards from the trunk and some moving downwards, it will usually confuse the design.
Weeping birch bonsai
There are many natural variations within birch trees, and one of these is the weeping form. This is where primary branches originating from the trunk move upwards in a natural style, and secondary branches will hang downwards off the primary branches.
The potential of a weeping form is one of the features that make birch such a great species for bonsai. It is particularly common in Betula pendula bonsai (silver birch).
Clump or mutli-trunk style
Birch regularly grow shoots or 'suckers' from their base. In nature, these will often grow into new trunks or separate trees, connected by a single root base - a clump.
Clump and multi-trunk styles are therefore very authentic for birch.
Pruning Birch Bonsai
As with most deciduous bonsai, we need to regularly prune the tree to improve branch taper and increase ramification.
The general idea is to prune back extended branches and shoots to two or three leaves. You can start doing this after the growth has hardened off.
(If you haven't heard that term before, 'hardening off' is used to describe leaves that have established a deeper green color and their waxy protective coating. It indicates they are fully formed and are producing energy for the tree.)
As mentioned earlier, one of the biggest challenges with birch can be branch dieback. Understanding how to prune birch trees can help you avoid this.
Pruning large branches
Birch tend to drop their lower branches if they have strong apical growth. To prevent branch dieback you need to keep growth at the top of the tree in check, and always hold back strong shoots at the top of the tree.
If you need to do structural pruning, with the removal of big branches, then you should do this either in late winter/early spring just before leaf growth, or in autumn just as leaves are dropping. You can also perform this kind of pruning after the first flush of growth has hardened off, but avoid doing it when leaves are newly forming.
When cutting large branches use a fine-toothed bonsai saw to make a clean cut that will heal well. Cover your cuts with cut paste to prevent air from entering the wound.
Large branches should never be cut flush to the trunk when first being removed. All deciduous trees, but birch, in particular, will have a high risk of dieback along the trunk. To stop this from happening you must leave a short stump.
This allows the tree time to compartmentalize the damage and form something like an internal barrier that will prevent dieback along the trunk when you remove the stump in a year or two.
Partial defoliation
Partial defoliation is a technique that can be applied to deciduous bonsai to greatly increase their ramification and branch density.
The theory is that removing most of the leaf mass on the tree will trigger a second flush of growth. In contrast to full defoliation, a portion of the foliage is left on the tree to continue generating energy that can fuel the new flush of growth and protect the health of the tree.
The technique involves removing 70-80% of the leaf mass from the tree.
After the first flush of growth has hardened off, you can prune shoots and branches back to two or three nodes (or the desired length of the branch if it still needs development). If the leaves of your birch are large, you will need to cut them in half to further reduce the foliage mass on the tree.
Leaf size will depend on many factors such as the genetics of the tree, fertilization, the number of fine twigs on the tree, and the amount of time the tree has been in a bonsai container. Birch leaves can be very small, but bonsai in early development are likely to have much larger leaves.
Repotting A Birch Bonsai
Like all other bonsai, you will know when to repot your birch when they meet one or more of the following criteria:
- Soil is decomposing and has 'soured', resulting in a wet substrate that can lead to root rot
- Roots have filled the pot and water can no longer percolate through properly, and instead will run off the top
- You want to change the style of your tree, whether that's putting it into a new pot, changing the front, or changing the planting angle
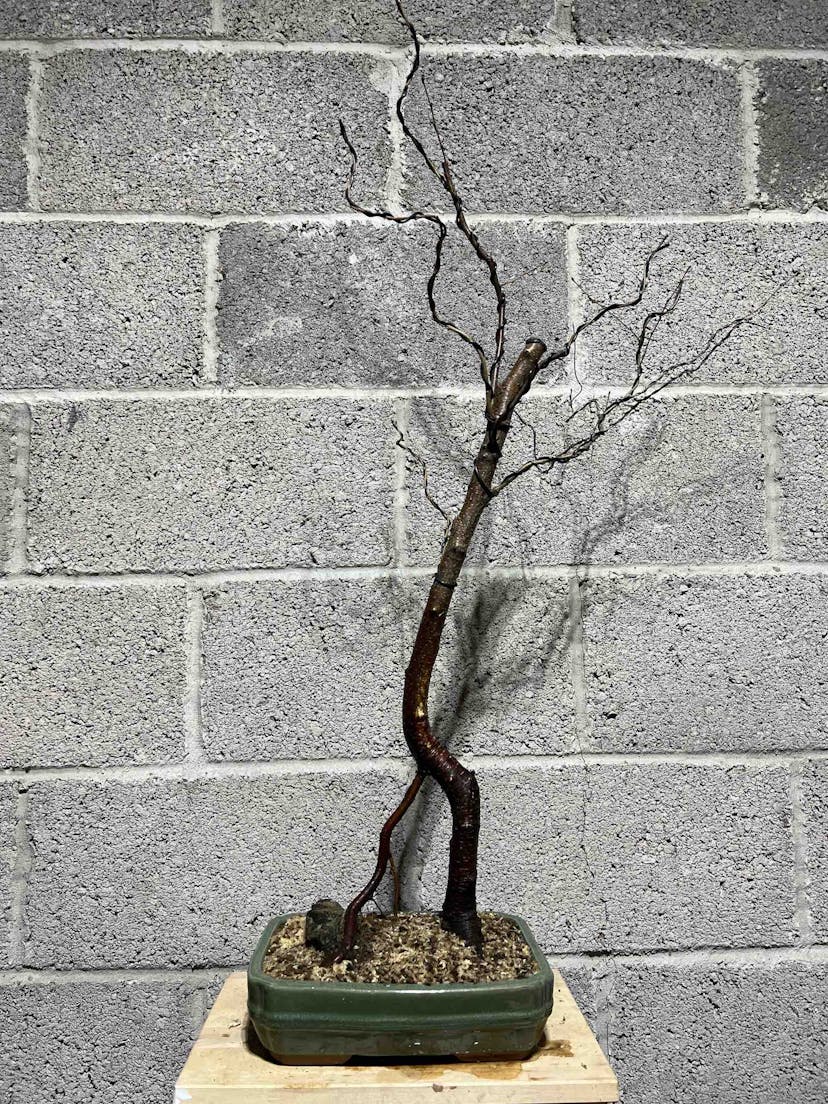
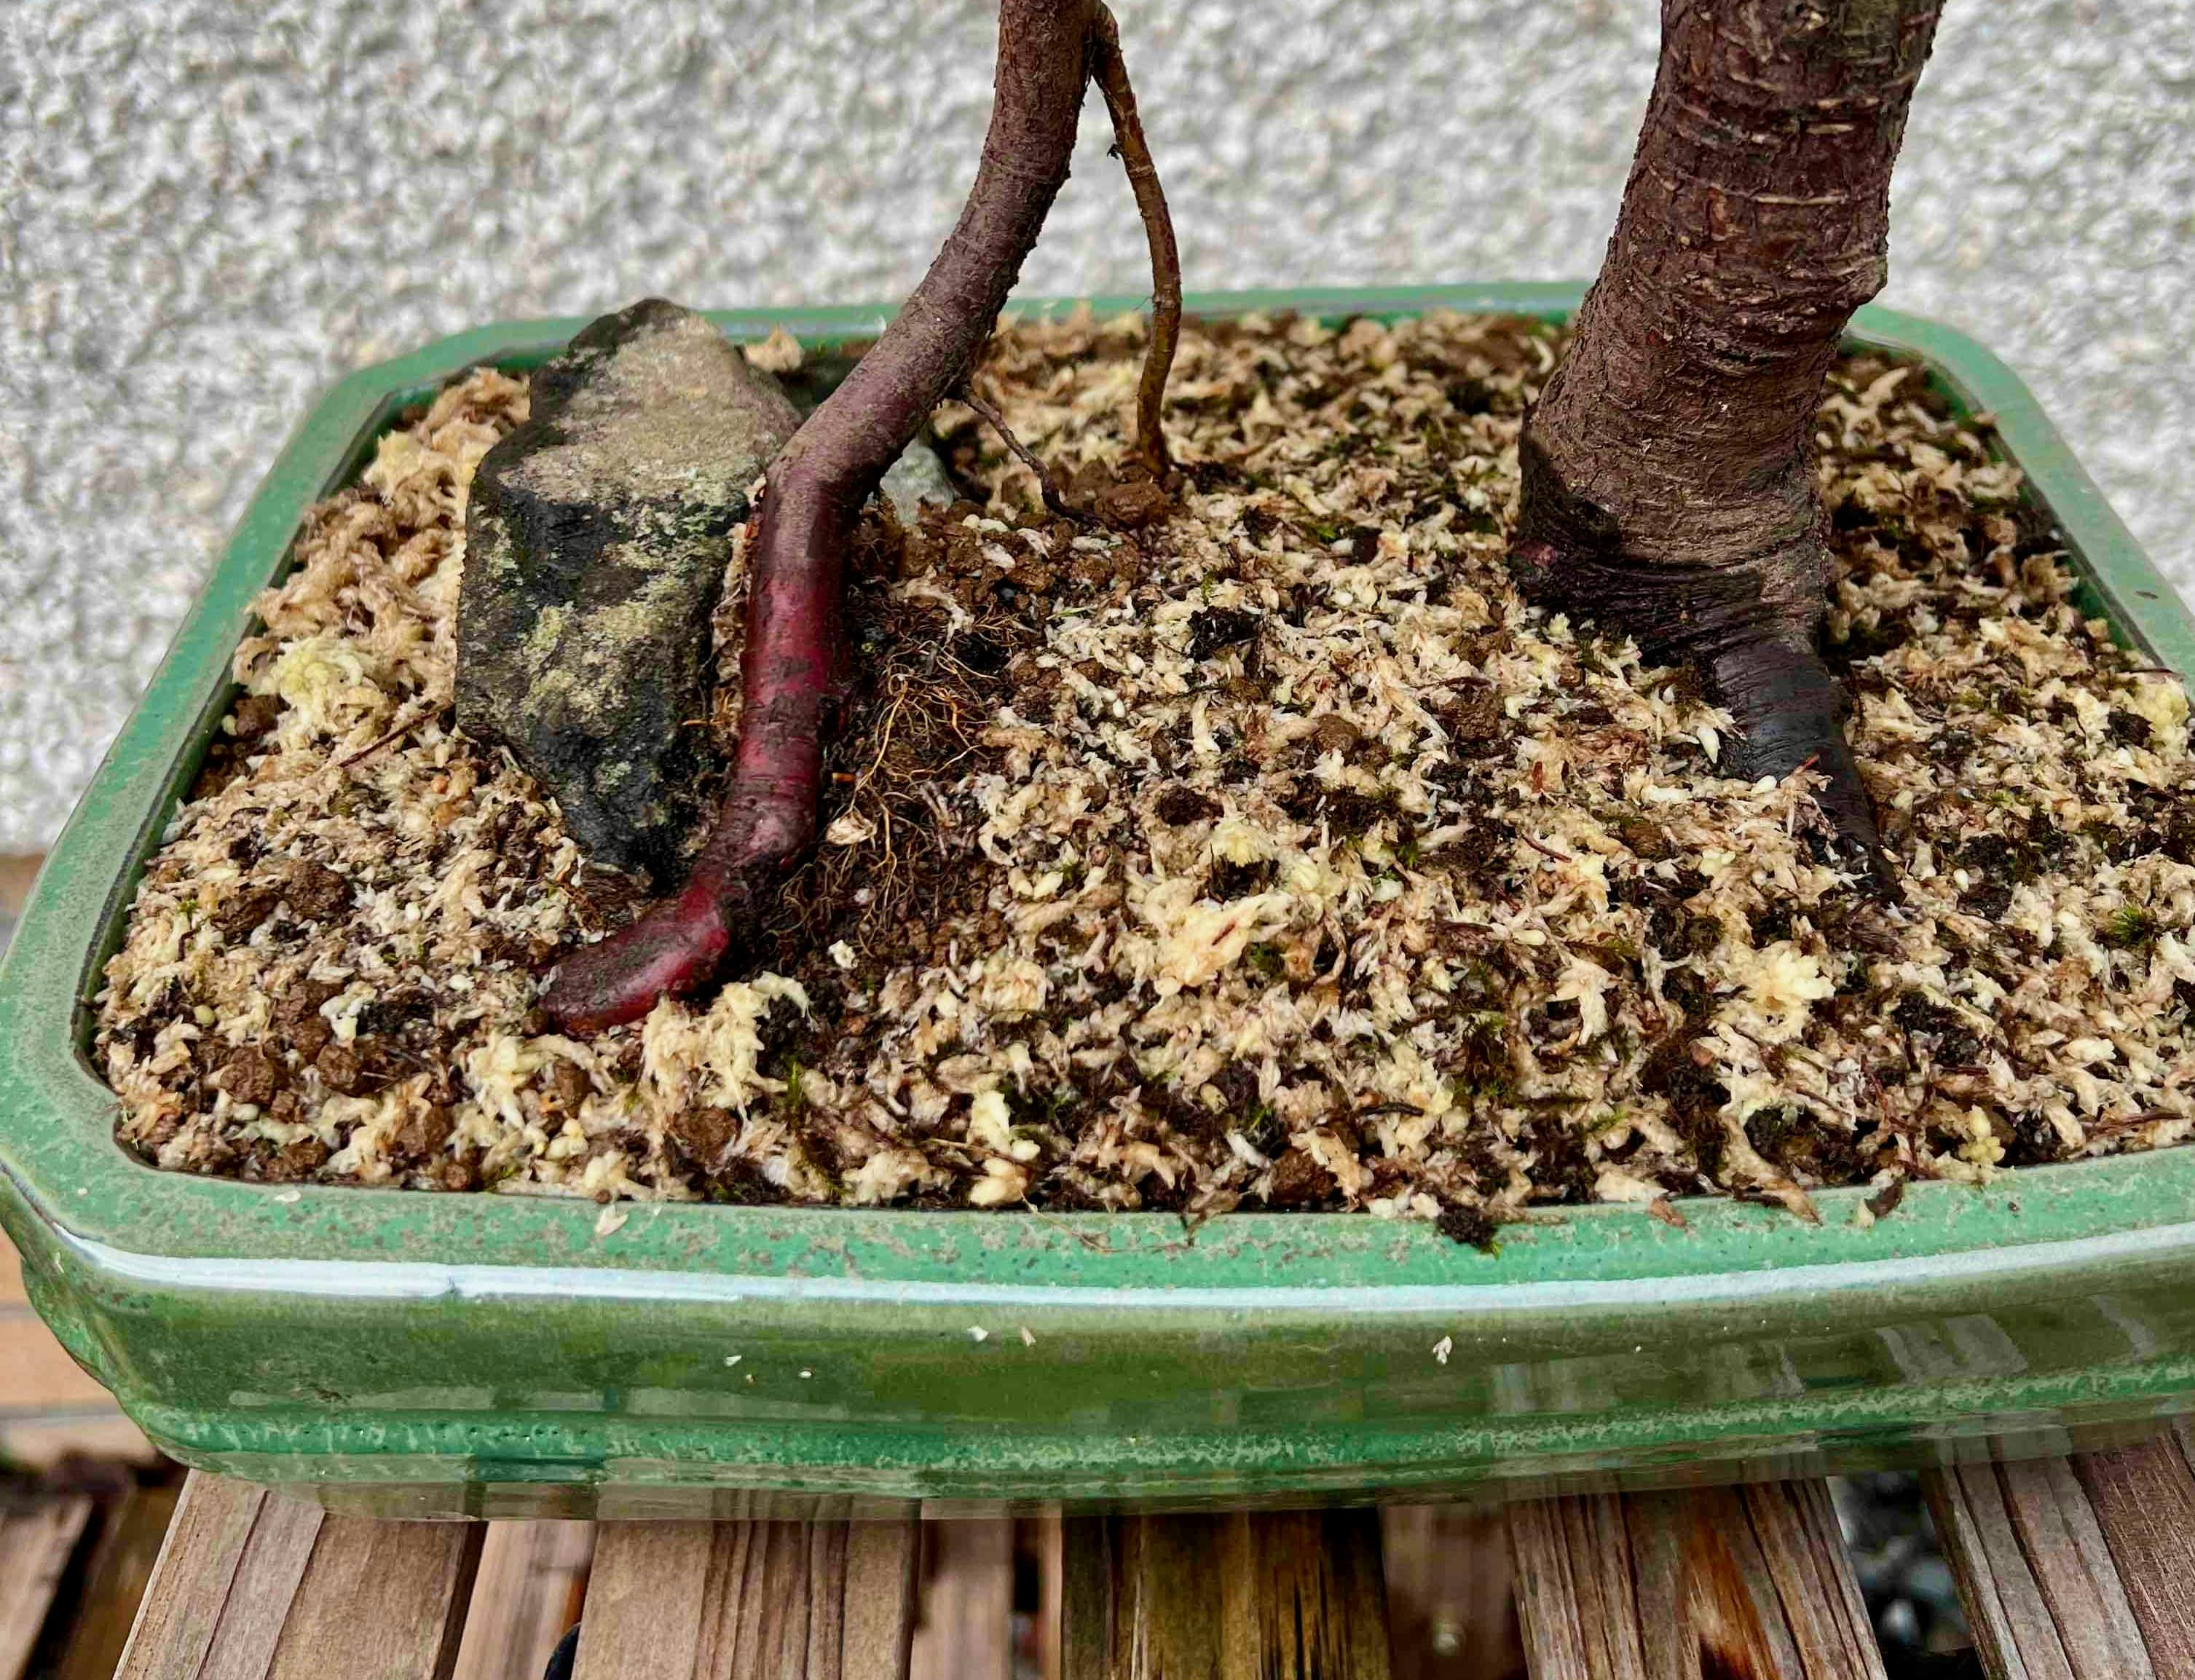
A silver birch bonsai in early development, freshly repotted into its first bonsai pot
When to repot birch bonsai
The best time to repot your bonsai is late winter or early spring, just as buds are turning green and leaf growth is about to begin.
If you repot your bonsai after it has started growing leaves, there is a risk that you remove roots essential to supporting those leaves and you may lose branches or the entire tree.
Tools
To repot your birch you will need some tools. These are not all essential, and if you are a beginner you will work out what you need most as you build your collection.
- Root pruning shears or some scissors
- Root sickle
- Wire cutters
- A chopstick
- Drainage hole mesh
Soil
The ideal soil for bonsai is an aggregate mixture that drains well. For deciduous trees, most professionals would use high-quality akadama (I use this linked brand regularly and it is very good quality).
Unfortunately, good-quality akadama can be both difficult to source and expensive, and so many hobbyists rely on other soil mixtures.
The most popular include varying quantities of lava, pumice, and chipped pine bark.
If in doubt, your nearest bonsai nursery (or one online) will likely be selling pre-mixed bonsai soil that you can use. It is best not to use regular garden compost because this can stay too wet and your tree can suffer.
The repotting process
1. Removing the tree from its current pot
If your tree is in a nursery pot this can usually be done by just gently pulling the root mass out of the pot.
If you are repotting an established bonsai, you will need to start by teasing away roots from the walls of the container using a root sickle. The sickle looks like a saw, but it should be used in a scraping or dragging motion. The serrated edge will catch roots and pull them off the wall of the pot.
Once the edges are free, you will need to then turn the pot over and cut any wires tying the bonsai into its pot.
2. Remove unwanted soil
Starting on the top of the soil mass, use your chopstick to tease away the soil. You will generally find some extension of the nebari (root flare) that will improve the look of your tree.
Next, use your chopstick to break through the matt of roots on the bottom of the root ball. You may need to use some force to do this. It is essential to remove the matted roots because they do not function well for the tree and can prevent water from flowing through the pot properly.
After you have removed the bottom root matt, tease away any black and broken down soil that can damage the health of your tree.
Finally, remove the matted roots from the sides of the root ball.
3. Work out your tie-down strategy
Your tree must be stable in the pot. You don't want it falling out if the pot is knocked over, but just as importantly the tree needs to be immobile for roots to grow.
A wobbling tree won't grow roots.
You will usually need to tie your tree down in two or three places to keep it secure. You can use large roots under the soil line, wrap the root ball (if your tree is small or light), or use bamboo stakes hammered into a very established root ball.
Once you have worked out where you want to tie the tree, tie your mesh over the drainage holes and add some wires to come up next to your tie-down positions.
Try to avoid messy or crossing wires on the underside of your pot. They will likely be less functional than if you make the effort to make things clean and tidy. Form and function have a strong correlation here.
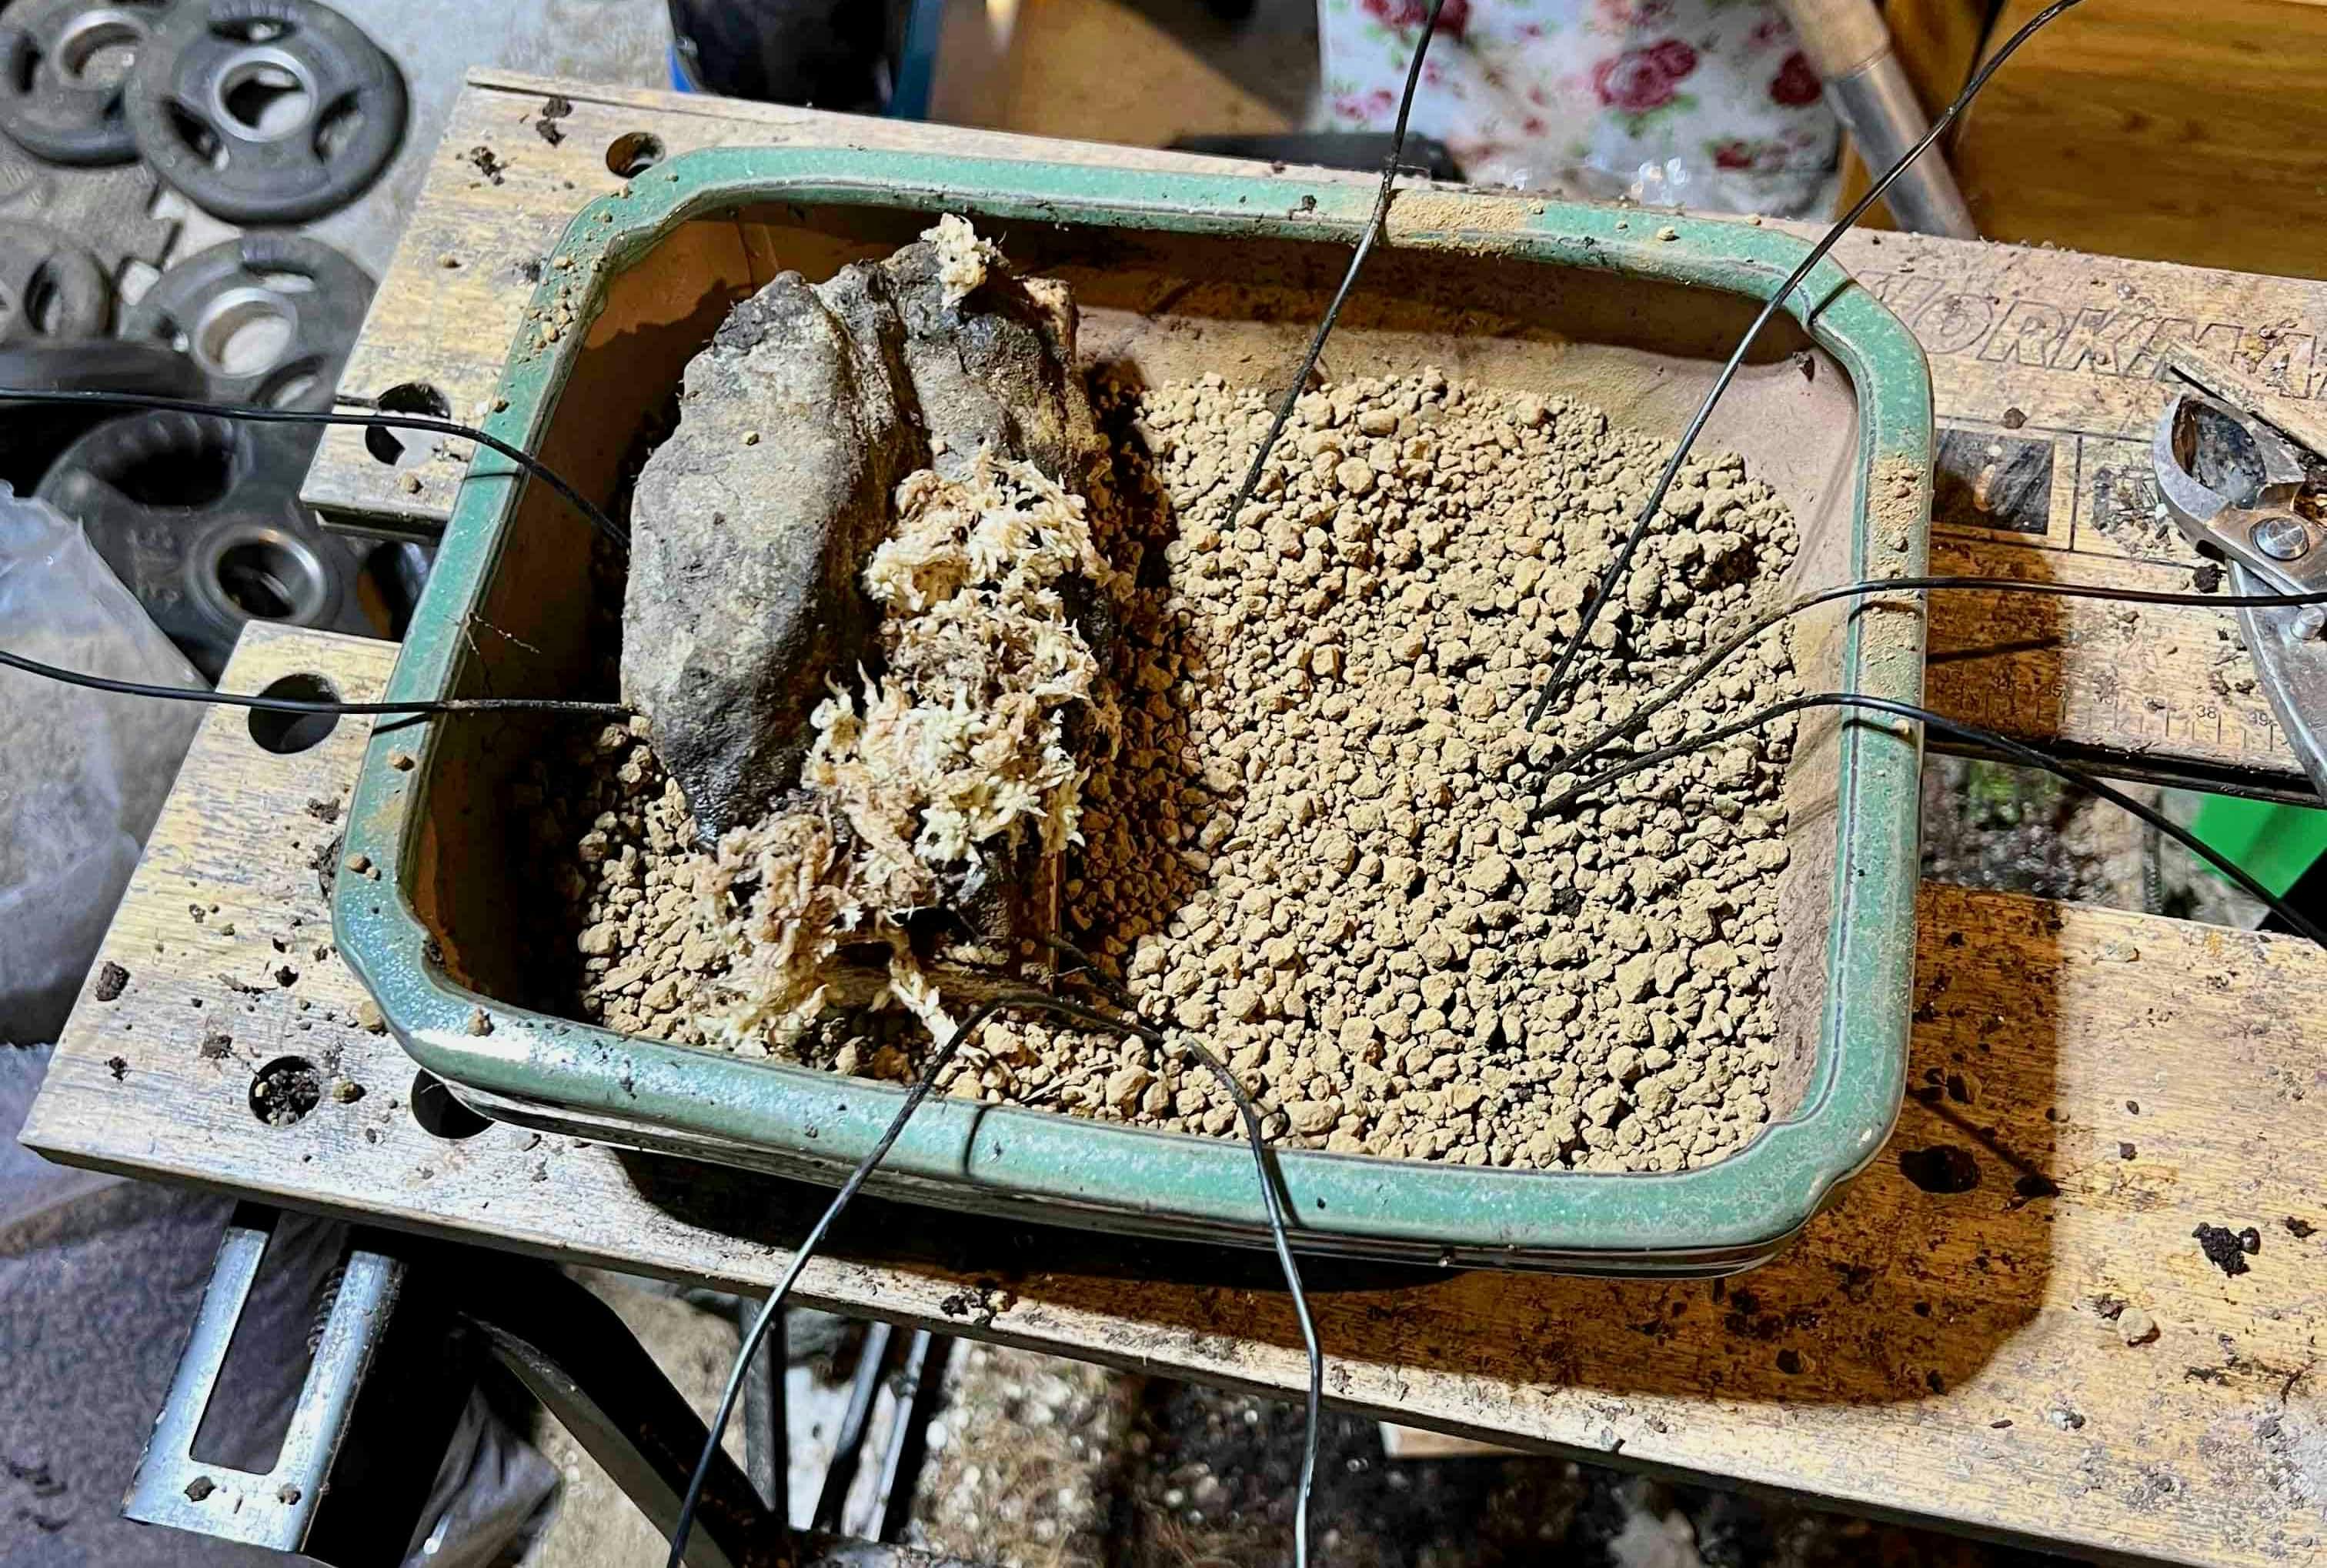
4. Add the tree to the pot
Cover the bottom of the pot with a very light layer of soil, then make a small mound of soil in the center of the pot.
Settle the tree into the mound and make sure it is positioned where you want it in the pot and at the correct angle. Look for as close to perfection here as you can because if you make any mistakes and you'll be looking at them for years!
When you're happy with the position of your tree, tie it into place with your wire tie-downs.
Add soil around the tree and use your chopstick to ensure soil enters any air holes in the root ball. Use a gentle stabbing motion all around the tree to wiggle soil into place.
5. Apply topdressing
Topdressing is an important part of your bonsai root system. It serves many functions:
- Protects akadama from passive breakdown from rain/watering
- Evens out the distribution of water in your pot by drawing water upwards from bottom to top
- Encourages the growth of friendly microscopic organisms that improve the health and vitality of your tree
- It looks great once it has established itself
You can create topdressing by grinding dried sphagnum moss and green moss on a small soil screen. These should be mixed in a 1:1 ratio.
Once you have filled your pot with soil, and before you water the tree, sprinkle a thin layer of topdressing over the soil. Lightly spray the top dressing with a misting bottle after you have placed it on the soil mass and it will stick in place when you water.
The topdressing will grow into a nice mossy covering over time.
6. Watering
After repotting your bonsai will need a very thorough watering. This can be done with either a hose or a watering can, so long as the water stream is a fine shower and not a strong jet.
You should very thoroughly saturate the root ball multiple times to wash away the dust and fine soil particles that have been introduced to the pot.
After watering, you should let the soil dry out significantly. This does not mean bone dry, but you should see a color change in the soil and topdressing as it dries out.
Letting the soil dry out is important because it lets the roots compartmentalize and heal. If you overwater your bonsai and roots are kept perpetually wet, it increases the chance they will rot instead of healing.
An airy soil mass also promotes new root growth, which is exactly what we want after a repot.
Continue watering your bonsai in this same manner. If you are unsure about how to water effectively, take a look at our bonsai watering checklist for guidance.
Fertilization
There is no "one size fits all" solution to fertilizing bonsai trees. It will very much depend on what stage of development the tree is at, what your goals are, and what techniques you are applying to the tree.
Liquid or solid?
There are some pros and cons with both, and ultimately much of it comes down to personal preference.
Solid fertilizer breaks down over time and slowly releases nutrients over weeks or months. Much of this breakdown happens as a result of microbial organisms in the pot interacting with the fertilizer. This relationship between your tree and microbial organisms is very good for the health of your bonsai.
Unfortunately, solid fertilizer is a favorite for dogs, squirrels, and birds. They may simply remove the fertilizer, or they may dig up the roots or even knock a tree off the bench.
Solid fertilizer will not work well if you don't have a good amount of happy bugs in your soil system to break it down, so if this is the case you may need to supplement with liquid fertilizer.
Liquid fertilizer has the advantage of being immediately available to the tree since it doesn't need to be broken down. You can also apply it more evenly over rootball when compared to solid fertilizer.
The downside with liquid fertilizer is that you need to apply it more regularly than solid fertilizer and it can also be quite an inconvenience if you have a lot of trees.
Either way, it's all down to personal preference really, many practitioners will often use a mixture of both.
Organic vs inorganic?
I would recommend you use organic fertilizers for your bonsai and avoid inorganic (chemical-based/synthetic) fertilizers.
As mentioned above, cultivating a healthy microbial system in your pot is fantastic for boosting the health of your bonsai. Inorganic fertilizers can be toxic to microbial organisms, so can harm the ecosystem within your pot.
If using liquid fertilizers I would use something such as liquid seaweed, kelp, or fish emulsion.
For solid fertilizer, I would use rapeseed cakes, Biogold, or one of the many local blends from a bonsai store.
How much to apply
If you have a young piece of material that needs to develop better roots, grow branches or heal wounds, then I would fertilize it regularly and heavily. That means usually every two weeks with liquid fertilizer, and increasing the quantity you apply with solid fertilizer (consult the instructions).
If your tree is more established and you are looking to refine it, fertilization becomes more tricky.
I would avoid fertilizing while the tree is growing in early spring. It will prompt the tree to grow bigger leaves with longer internodes, which will lead to coarser branching.
Once you have performed your first partial defoliation of the year I would suggest you start fertilizing your birch. If you are using a solid fertilizer I would also give an initial application of liquid to trigger the second flush we are looking for following the partial defoliation.
I would then fertilize every 6-8 weeks.
If you feel your growth is too long or leggy, hold back on the fertilizer. Fertilizer is a bonus to the tree, not an essential. Birch will grow very well without regular fertilization.
You do not need to fertilize your birch bonsai when it is dormant over winter. It won't add any benefit, and the excessive salts in the root system could be detrimental to root health.
Pests and disease
Birch are generally healthy and vigorous trees, but like most bonsai they can be subject to common pests such as aphids and spider mites, as well as some other infections specific to birch trees.
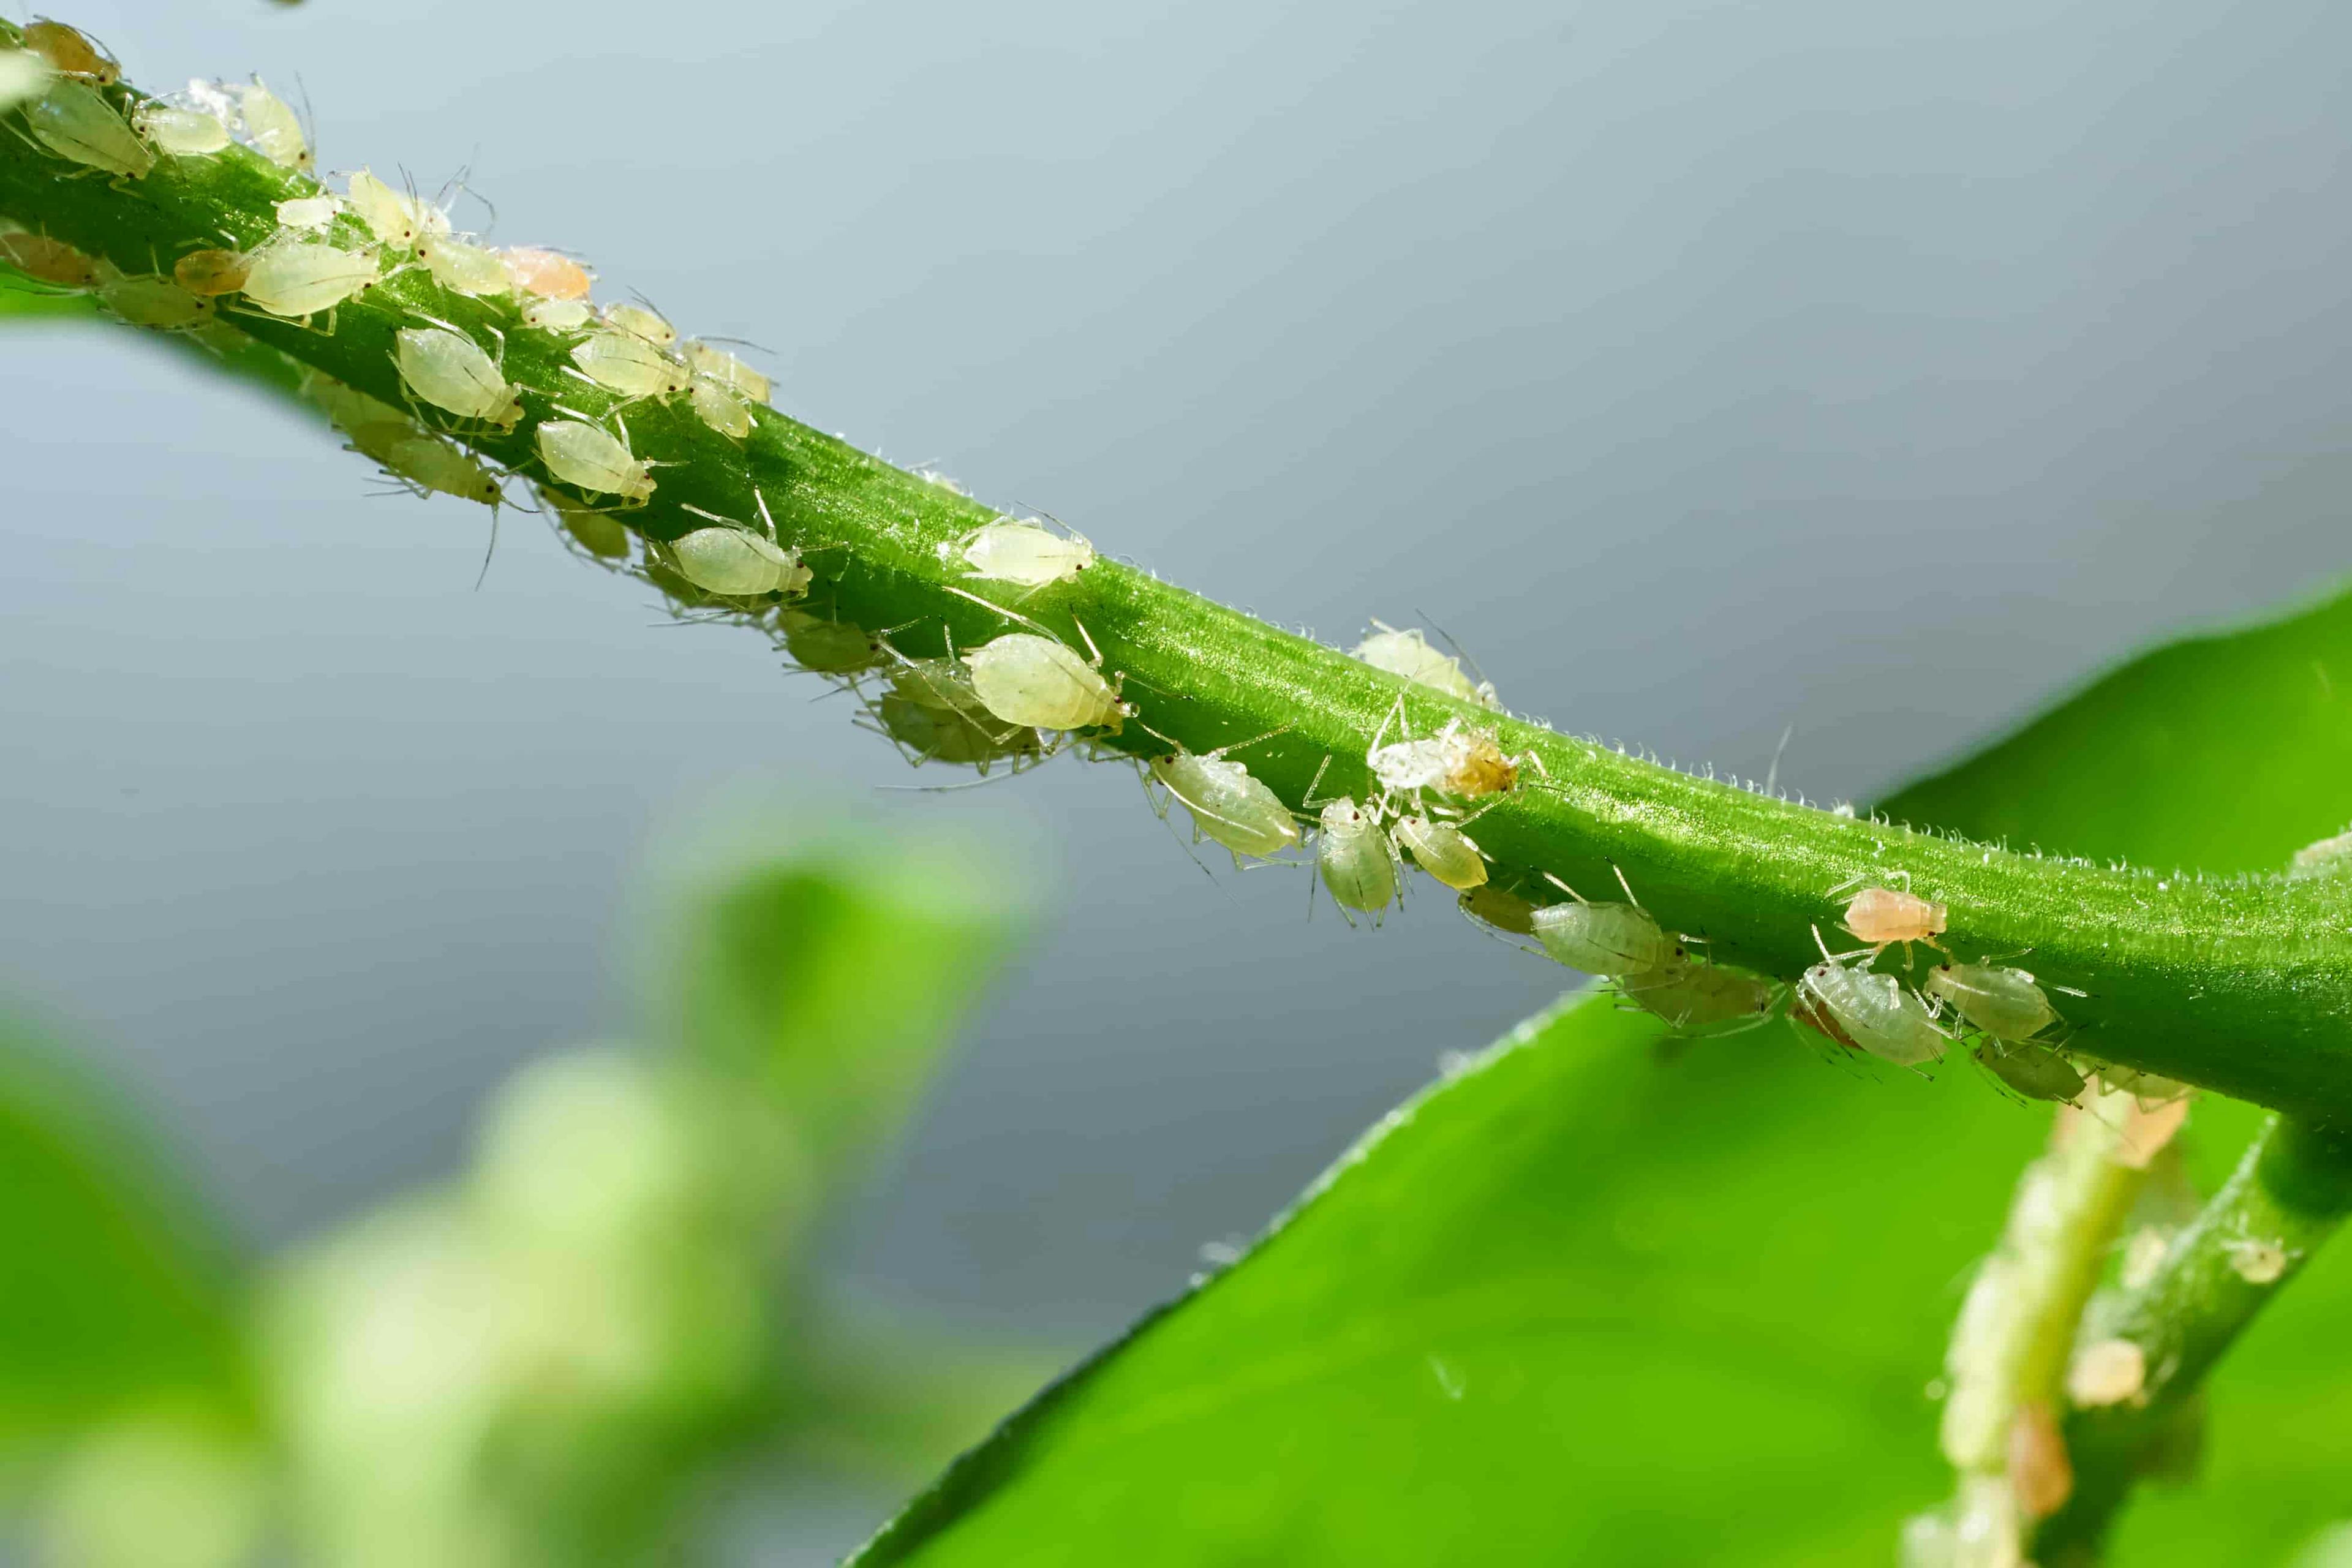
Aphids
Aphids (blackfly, greenfly and whitefly) are small insects that feed on sap. They are common and not a cause for major concern, but they should be treated when identified.
Aphids usually appear in late spring or early summer. The first indicators are sticky patches on the surface of leaves that has a shiny appearance. This is caused by a sugary substance named honeydew that is excreted by the aphids. Honeydew can be a breeding ground for black sooty mold, so you should also watch out for this.
Other indicators of an aphid infestation include seeing skin casts (empty aphid skins) on top of leaves, as well as spotting the mature insects directly. They are commonly found on the tips of fresh shoots.
Aphids can be treated in a variety of ways. The easiest is to use an insecticide which you can source from your nearest garden center or bonsai store.
If you do not wish to use chemicals, physical removal of the insects can be effective. However, for this to work you must be consistent as new aphids will continue to hatch for days or weeks, so inspection once or twice daily is required.
You can physically remove aphids using your fingers, or by washing them off with a fairly strong hose. If you are using a hose be careful not to damage the foliage, and make sure you are not excessively watering the pot.
Birch leaf rust
Birch rust is a fungal disease that causes orange or black spots (known as pustules) on the undersides of leaves.
It is caused by a fungus named Melampsoridium betulinum.
Infected leaves will be dropped by the tree. If the infection is severe, the tree may lose so many leaves that its overall health can begin to decline.
The fungus can be spread via water droplets, so it is best to keep infected trees out of the rain and only water the rootball, not the leaves.
A copper-based fungicide can be used to prevent further spread of the infection, but it will not cure leaves that are already infected. These should be carefully pruned so they do not touch other leaves.
Birch bonsai FAQs
How do you care for a birch bonsai tree?
To care for a birch bonsai you need to:
- Grow it outdoors
- Water regularly but only when needed
- Prune a few times per year
- Repot when required
- Fertilize according to your goals
Is a silver birch a good bonsai?
Yes, definitely. Silver birch (Betula pendula) grows well in a bonsai pot and looks amazing. They are great for bonsai.
How do you prune a bonsai silver birch tree?
Silver birch bonsai should be pruned through the growing season as leaves harden off. You should prune back to two buds to allow them to grow and increase the fine branching on your bonsai. See our pruning section for more details.
Can you grow a birch tree indoors?
Birch trees should not be grown indoors. They require the temperature, light, and humidity levels of an outdoor environment.
How do you make a birch bonsai tree?
You can make a birch bonsai tree in a few ways:
- Buy a birch tree from a nursery, then pot in a bonsai pot and style it
- Collect a yamadori birch tree
- Propagate a birch from cuttings
- Air layer a branch from a larger tree
- Grow a birch tree from seed (they grow like weeds in my garden from a nearby landscape tree)
Can you keep a birch tree small?
You can keep a birch tree small by containing its root growth using a bonsai container and pruning regularly to direct growth to interior branches.
Can you grow birch in a container?
Birch grow very well in containers provided you water and repot when required.
Can you bonsai a river birch? (Betula nigra)
River birch does well as bonsai trees. The only difference I would recommend in their care from other birch bonsai is they prefer slightly more shade.
Can you air layer silver birch?
Silver birch air layer very easily and this is a great way to propagate material for bonsai. You can also ground layer silver birch bonsai to improve nebari.