- Published on
Norway Spruce Bonsai Tree Care Essentials

Norway Spruce, or Picea abies, (also known as European Spruce) is a very common and well-known tree that is often used as a Christmas tree. With reddish bark and a healthy gloss to their needles, Norway Spruce can be an awesome specimen to use for bonsai. Norway Spruce bonsai care is simple when compared with some other species and therefore they are great for both beginners and more experienced hobbyists.
In this blog, we'll cover all the essentials of Norway Spruce bonsai tree care.
Placement
Norway Spruce trees can tolerate a good amount of sun and will benefit from being cultivated out of the shade. If you have recently repotted your bonsai or done some styling with a lot of foliage removal, then it is a good idea to keep the tree in morning sun/afternoon shade or all-day dappled shade to give it time to recover.
Picea abies is a species that grows well in mountainous regions and the tree can tolerate freezing temperatures very well. That said, it's important to remember that any tree in a container will be more susceptible to frost, and the smaller the container gets the greater that susceptibility will be. You should also take care if your tree has had any health issues, as this can impact their winter tolerance.
Norway Spruce bonsai can generally be left out in temperatures below freezing without any real winter protection. If you have an older specimen or one you are concerned about, then consider heeling it in with leaves or mulch or moving it to a cold frame.
Norway Spruce bonsai indoors
You may find other sources online claiming that Norway Spruce can be cultivated as in indoor bonsai. Unfortunately, I have not found this to be the case. Spruce trees need a period of dormancy each year. This dormancy is triggered by a reduction in light levels and temperature that comes with the onset of winter.
These cold and dark conditions can't be replicated indoors (unless you want to live in a cold, dark house). Without its required dormancy each year, your Norway Spruce bonsai will slowly deteriorate over time and ultimately perish.

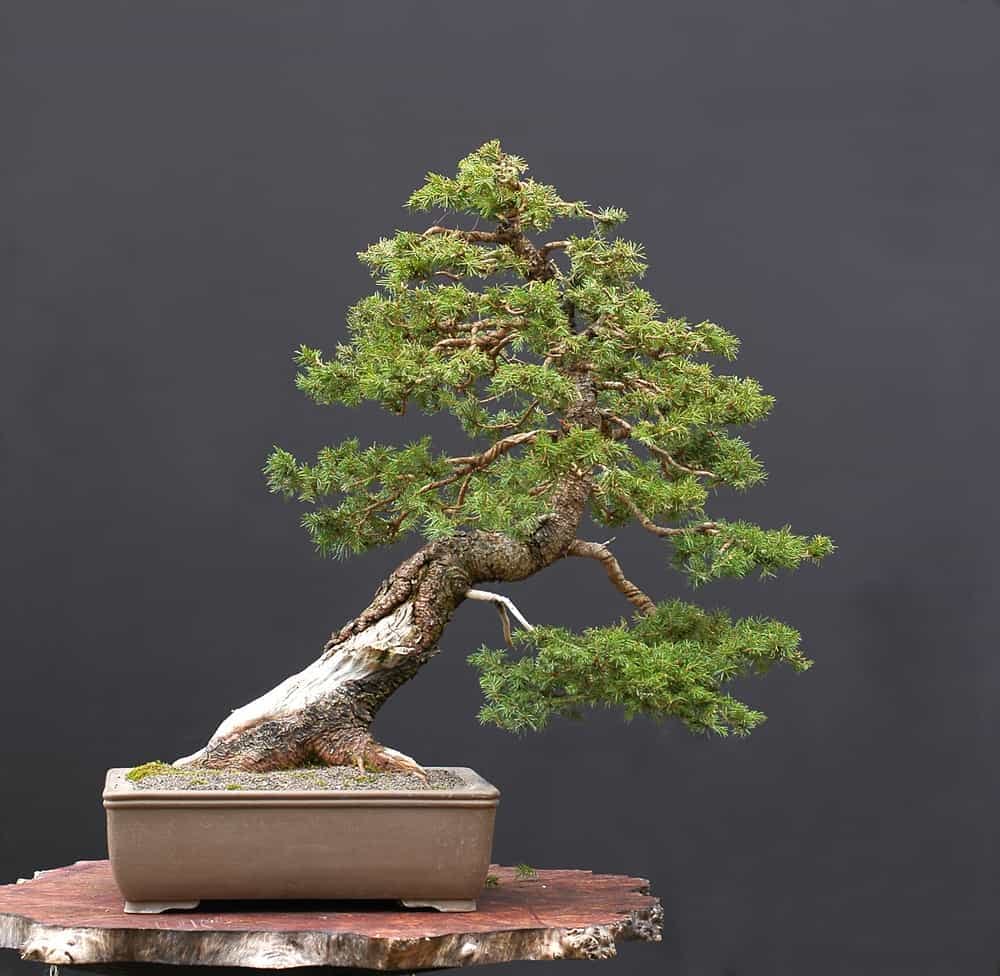
A Picea abies bonsai from Walter Paul, one of the greats.
Pruning
There are various methods you can use to control growth on a Norway Spruce bonsai, depending on what time of year it is and how developed your tree is. But before we look at how to prune, it's important to mention back budding.
Norway Spruce will set up good interior buds if they are allowed to grow vigorously and enough light is provided to the interior of the bonsai. Pruning branch tips can stimulate those buds to grow, but only when they have been set up in the first place.
If you are looking for interior growth on your Norway Spruce bonsai, the best course of action will be to fertilize heavily and leave it alone for a year, pruning nothing. Next year you can then pinch or prune growth to stimulate established interior buds to push.
Structural pruning and branch selection
Structural pruning is an important part of creating and maintaining Picea abies bonsai. Spruce trees grow whorls of branches, meaning they can have 3-5 (or more) branches originating from the same node of the trunk.
If these branches are all left in place, they will create swelling at the origin of the branches, which will cause inverse taper on a bonsai tree. To prevent this from happening, all but one of the branches must be pruned.
When working with new stock this is usually not achievable in the first styling as it can be too great a reduction in foliage mass. If this is the case, then cut back so only 2 branches are left and finish the job the following year. If in doubt, be cautious and don't risk the tree dying.
Structural pruning is best performed in late spring, just as buds are showing green and preparing to push. This is when the tree is bursting with energy and can easily heal cuts as it moves resources for the growing season.
Pinching
Pinching new growth on a Norway Spruce bonsai is a great way to balance energy and nurture the growth of interior buds. It's performed in early Summer, as new growth is elongating.
The aim of pinching in a Spruce bonsai is to evenly distribute the growth across the canopy of the tree, which prevents strong branches from outgrowing any of the weaker ones.
Pinching is a refinement technique, so if you are still deciding on the structure of your bonsai, or making big styling decisions then you probably shouldn't be pinching. In those cases it's better to leave the new growth on the tree to accumulate energy, then prune in early Autumn to achieve your design.
It is easy to know which buds need to be pinched and which should be left alone by thinking about the desired silhouette of your tree. If a shoot grows outside the silhouette, you pinch it back to where you want it. If a shoot is not growing past the silhouette, you leave it alone to gain strength.
It really is that simple and it doesn't need to be over complicated. Doing this weekly over the growing season can really help to mature the canopy of your bonsai.
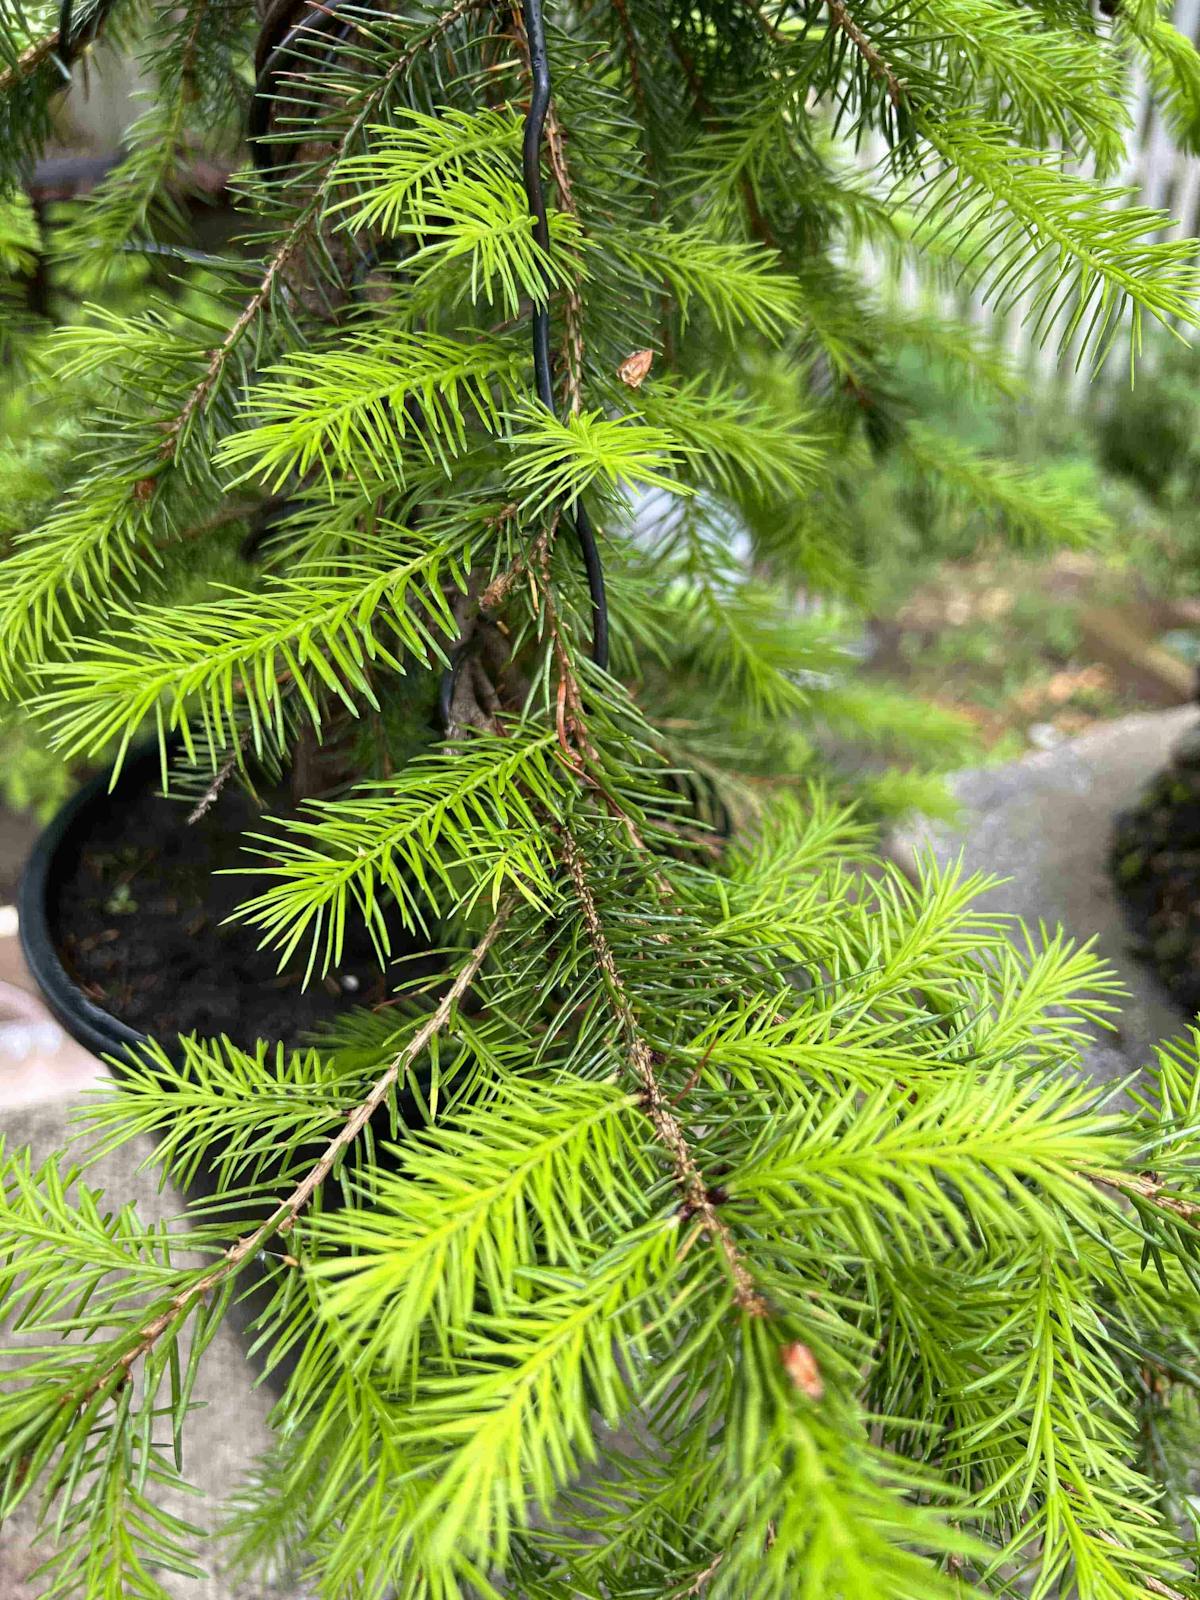
New growth on a Norway Spruce bonsai. This tree is in early development so isn't being pinched.
Wiring
Spruce in general have a bad reputation when it comes to wiring, and Norway Spruce are no different. They grow in alpine regions where they have adapted to be very resilient to snow. Spruce branches are very bendable, which stops them from breaking under heavy snow loads.
This has pros and cons when it comes to bonsai.
In the pros column, having bendable branches means you can generally achieve your desired design with little risk of breaking branches. You can add radical movement, or bend branches to visually shorten them and move foliage closer to the trunk. You can start wiring a Norway Spruce bonsai tree from a young age, as little as 3 years after growth from a seed.
On the downside, these malleable branches are also well known for springing back once any wire has been removed. In my experience, this is often due to some beginner or intermediate hobbyists removing wire from their bonsai too quickly, but there's no denying that Spruce branches can take longer to set than others and may need re-wiring.
Norway Spruce has rough bark and I would recommend you leave wire on your bonsai branches until you see it biting in. This means the tree has grown enough tissue in the new branch position to generally hold it in place and the minor scars can be easily healed in a couple of years.
It's also worth noting that the more you bend a branch, the quicker it will set. This is because you cause minor damage to the cambium layer, which stimulates the branch to heal, which in turn holds the bend in place. This is true for all bonsai species but particularly for Norway Spruce.
Watering
Norway Spruce bonsai don't have any quirks when it comes to watering, you just need to follow good bonsai watering practices.
Root growth is stimulated in bonsai trees by the wet/dry cycle of thoroughly watering your bonsai, then letting it dry out. By 'dry out', I mean the top half-inch should be dry.
By allowing the pot to dry out, you ensure enough oxygen is entering the root system. Tree roots depend on oxygen to trigger growth.
Overwatering your bonsai can suffocate the roots and cause the roots to dieback. It can also create an airless environment that encourages the growth of invasive vascular pathogens which can lead to root rot.
Repotting
In bonsai, the function of the pot is to restrict the growth of the roots. This helps to control the growth of the tree, because as roots branch and grow into finer tips, the branches of the tree will do the same.
A confined root system will give you more ramification and smaller internodes of growth, which contribute to the scale of a tree in miniature.
To get the most out of the bonsai container, you need to leave the tree in there as long as possible before repotting. When you repot, you add new soil which will allow coarser roots to grow. This helps to replenish the root system, but will also lead to coarser and less balanced foliage growth for the following one or two years.
All this is to say you should not repot your Norway Spruce on a schedule. Read the tree and look for signs that it needs a repot. These will be:
- Loss of percolation through the pot, where water washes off the top of the soil mass rather than flowing through it
- Decomposition of soil, leading to a wet and airless environment that can contribute to root rot
If you want to change the pot, the planting angle of the tree, or the front of the tree, those are also good reasons to repot.
How to repot a Norway Spruce bonsai
Repotting should not be taken lightly, as handling the roots is a stressful event for a bonsai tree. The key to success with repotting is to be intentional with your actions. Don't just chop away roots to feel like you're making progress. You need to analyze the root system, decide which areas need to be addressed, and then work on them.
An important thing to bear in mind when repotting Norway Spruce is they are far more likely to survive and thrive the repot if a portion of the root ball is left untouched. This area will be the base of strength for the tree at the start of the growing season and allows them to feed the foliage that will rebuild the rest of the root system.
Here are the basic steps you should follow when repotting your bonsai:
- Using a root sickle, start by scraping free the roots at the edges of the pot. You'll need to free at least 50% of the pot wall in an established root ball.
- Cut any wires that are holding the tree in the pot and gently pull the bonsai out of the pot.
- Using a chopstick, start scraping away soil from the top of the rootball to reveal the nebari. Keep working down through the soil mass until you find intact soil particles. This is essential to allow water to flow from the top of the rootball to the bottom.
- Next you need to work from the bottom of the rootball upwards. Remove matted roots with a chopstick or a paint scraper. You can then work down the height of the soil column as much as you need with a chopstick. You should aim to remove areas of black, wet, decomposed soil. These regions can lead to ill health in your tree and you'll find that fewer roots grow there, making soil removal easier.
- Matted roots at the side of the rootball can now be removed to allow space for new root growth. This should be the last thing you do to the rootball because it can make the rootball unstable and difficult to manage if it is not a well-established tree.
- Prepare the pot by adding drainage screens and setting up tie-down wires to secure the bonsai in place. Stabilizing the tree is very important because if your bonsai is wobbly, it will stop the growth of new roots.
- Add soil to your pot, first with a very light layer on the bottom, then add a small mound in the center. Place your bonsai on top of the soil mound shift it and twist it as you settle the tree into the pot. This helps to introduce soil into any cavities you have created when removing old soil. Tie the tree into place with your tie-down wires and fill the rest of the pot with soil to fully stabilize the tree.
- With a chopstick, use a soft stabbing motion to push soil deep into the pot to fill any holes. This is an important step that shouldn't be neglected.
- Prepare some topdressing with dried sphagnum moss and green moss in a 1:1 ratio, ground up on a sifting screen. Sprinkle this over the soil mass, then mist it with some water from a spray bottle to make it damp. Once damp the topdressing will not blow away. This helps to develop a mossy covering over your bonsai, which has many benefits. It helps to even water distribution across the pot and encourages the growth of healthy microorganisms. It also looks great.
- The last step is to give your bonsai a very good watering. Water the pot very thoroughly until the water starts to come out clear. This is to wash out any crushed soil particles that can congest your pot and hold too much moisture.
Repotting aftercare for Norway Spruce bonsai
Aftercare for a newly repotted bonsai is almost as important as the repotting process itself. Roots have experienced trauma from pruning and will need ideal conditions to heal well and start new growth to rebuild the root system.
To form callus and heal, you must allow your bonsai to dry out after its first watering. Wait until the topdressing is dry before you water the tree for a second time. This gives roots a very oxygen-rich environment following the repot, which will stimulate callus formation and will promote wound healing. If you overwater or leave the bonsai out in the rain, there is a chance the roots will rot rather than heal. If this occurs across the whole rootball you may be in trouble.
As well as controlling water, you should place your Spruce in a sheltered area away from wind and extreme sun. Morning sun with afternoon shade would be ideal.
The reason for this is the tree's ability to move water has been reduced since it has had a reduction in the number of roots it has. This could lead to it drying out or overheating if exposed to extreme elements, so keep it sheltered for the first couple of months following the repot.
The final note I have for you is to avoid fertilization after a repot. Fertilizer has a very high salt concentration, which can be damaging to emerging root tips and do more harm than good to your tree. All being well, you can resume fertilization in the summer or autumn following a repot in spring.
Fertilization
The fertilization of Norway Spruce bonsai trees doesn't differ wildly from other conifers. Fertilization, as with all general bonsai care should have a clear strategy behind it.
If you want strong growth, you'll need to fertilize heavily (say every week or two). If you want to refine an established Norway Spruce bonsai, you'll need only light fertilization (every 6-8 weeks).
I would recommend the use of organic fertilizers over chemical-based ones. This is to help the growth of microorganisms that live in symbiosis with your tree's roots and help them to draw water and fight disease. A healthy root system is the key to a healthy bonsai, and chemical fertilizers can be harmful in forming this relationship in the pot.